I think it’s a mixture of not having a huge amount to look forward to at the moment (oh hi tier 3) and that Eva is so much more aware of things, but I’m so into Halloween this year! Eva can say ghost, is obsessed with Halloween baby shark videos and cackles at pumpkins, we have a little Sanderson sister on our hands.
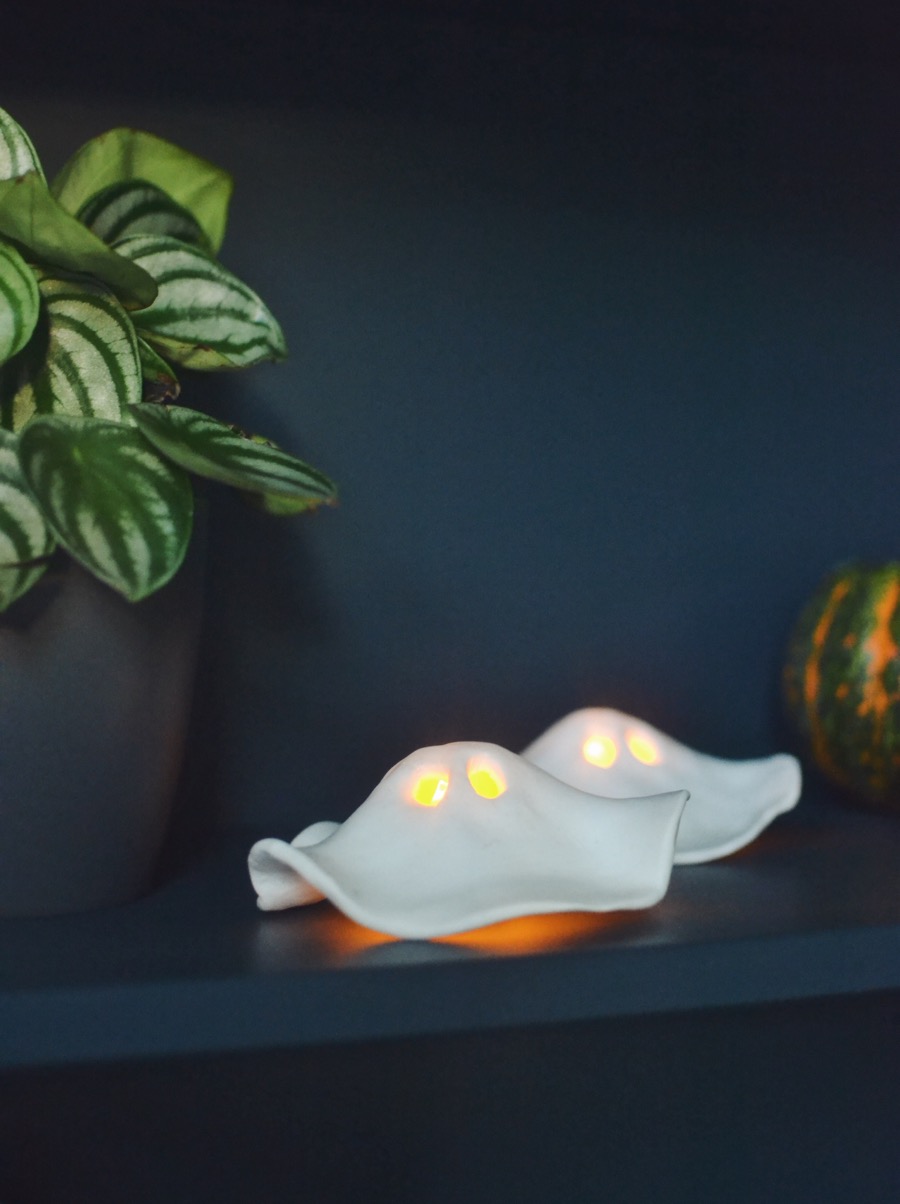
I’ve been taking advantage of her new found love of spooky season and fitting in as many Halloween based activities as I can. Last weekend we went pumpkin picking and made these cute little ghost tea light holders! I saw something similar on Pinterest a while ago so took it upon myself to order some clay and rope Eva into helping me. You can see a bit of a how to guide below if you fancy having a go too.
What you’ll need
- Oven bake or air drying clay
- Battery operated tea lights
- A knife or clay modelling tools
- Rolling pin
- Greaseproof paper
- A cupcake tray
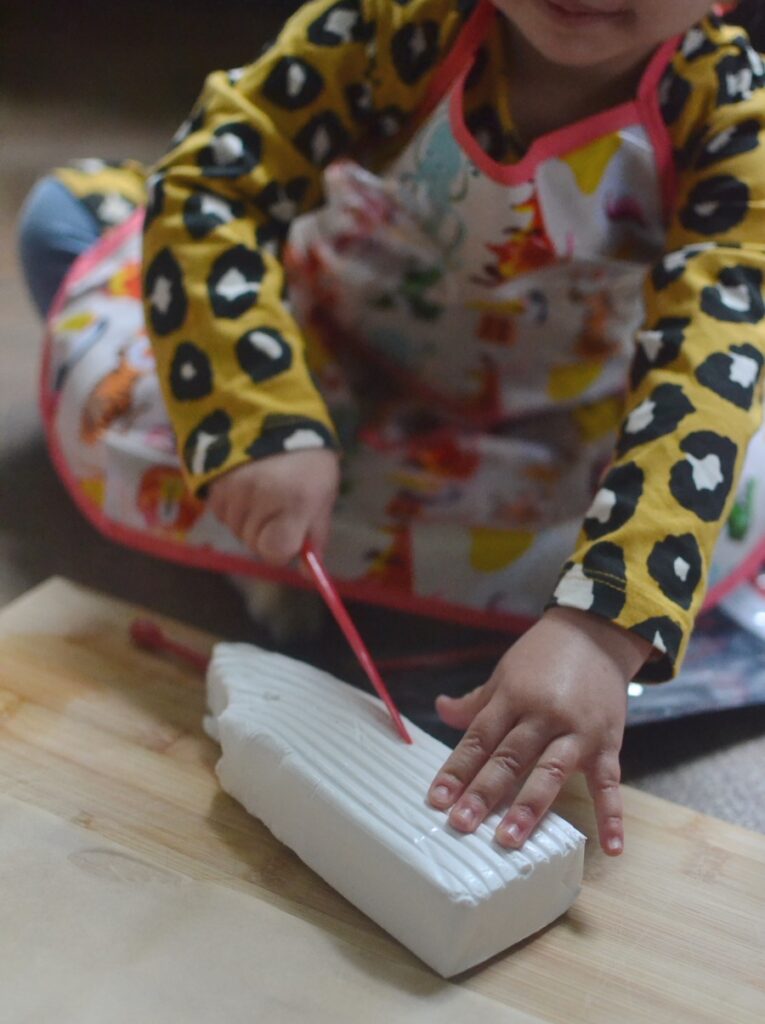
I bought some Fimo oven hardening clay from Amazon and it was SO hard. So hard Eva that wasn’t really able to help, but she enjoyed wearing her new apron, stabbing the clay for a bit and dancing around to the Halloween music while I made the ghosts. It takes a lot of moulding to warm it up and make it easier to use. If you’re using this, it is probably a craft project for older children and grown ups but you could use air drying clay or make some salt dough to give it a go with little ones.
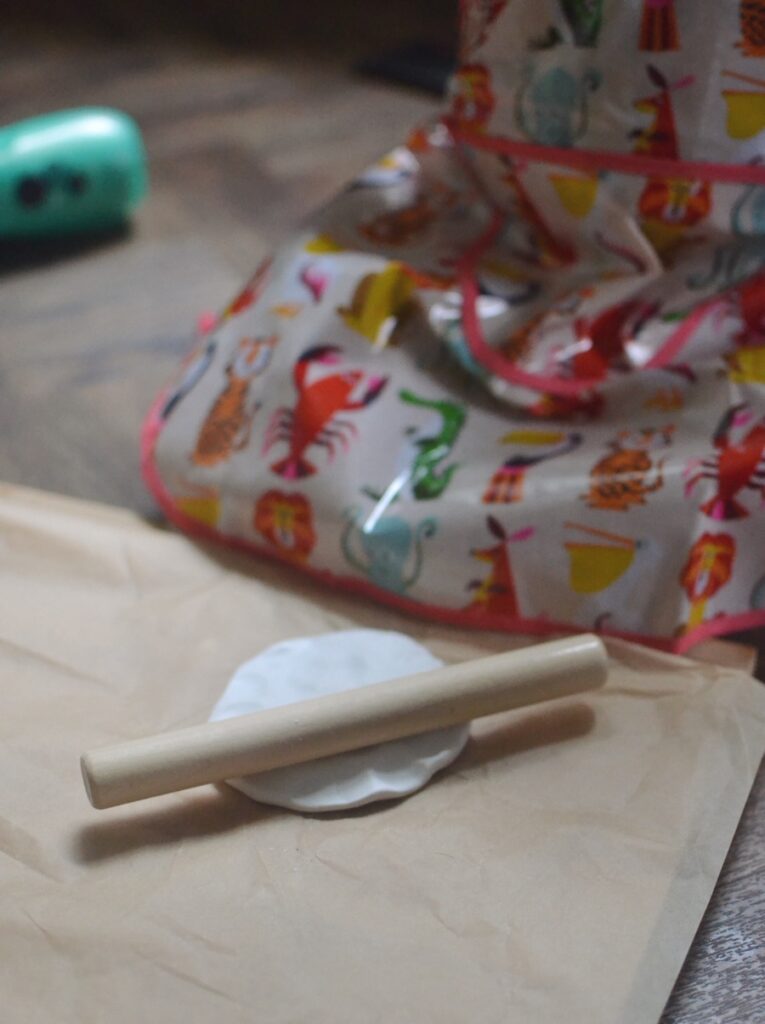
I finally managed to maneouvre the clay into a flat circle using my fingers. I then pinched one of Eva’s mini rolling pins to get it nice, flat and smooth. I used greaseproof paper underneath and on top of the clay while rolling so it didn’t get stuck to the rolling pin. I also gave it a good wash afterwards just in case.
Once the clay was about 10cm in diameter, nicely rounded and flat, I grabbed the cupcake tray and turned it upside down. I covered one of the cupcake bumps (no idea what they’re called so bumps it is) with a little greaseproof paper and rolled a ball of clay (about 2 cm in diameter) to sit on top, this helps give the ghost a little head shape.
I added another bit of greaseproof paper so the ghost doesn’t get stuck to the ball of clay, and placed the ghost on top of ball of clay on the cupcake bump. I curled up the edges of the clay to make it look like the ghost was floating along and smoothed any marks out.
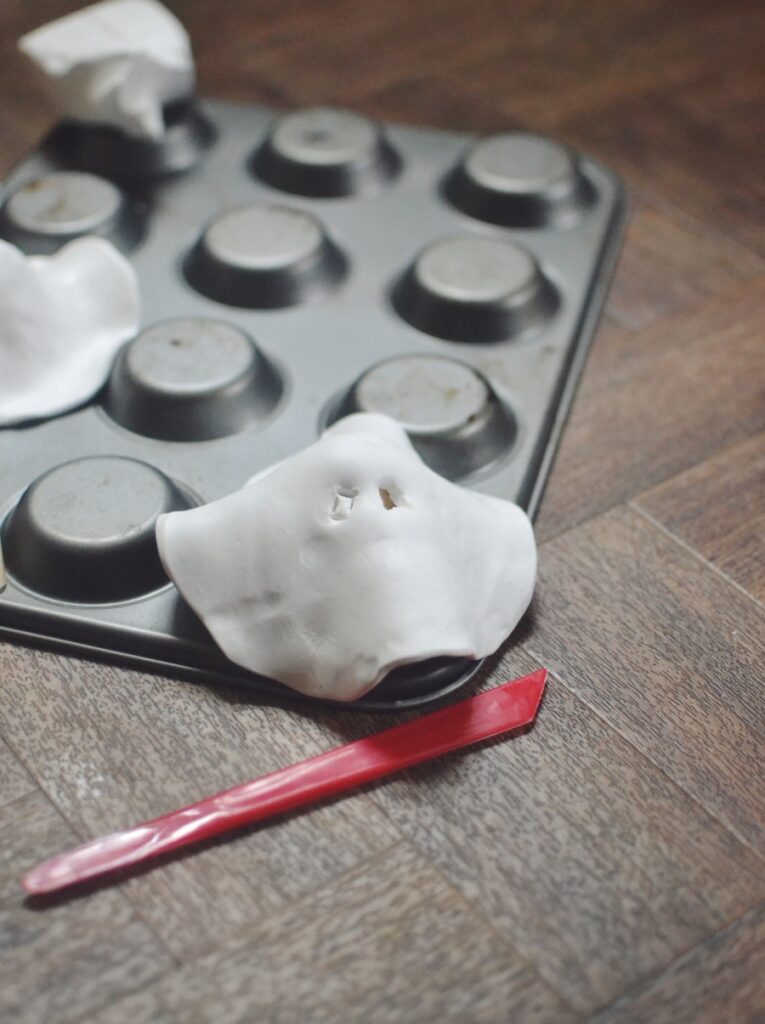
I used the clay tools to create eyes, and used my fingers to smooth around the edges. I just added eyes for our ghosts but you can add a mouth or whatever you’d like to give them a bit of character!
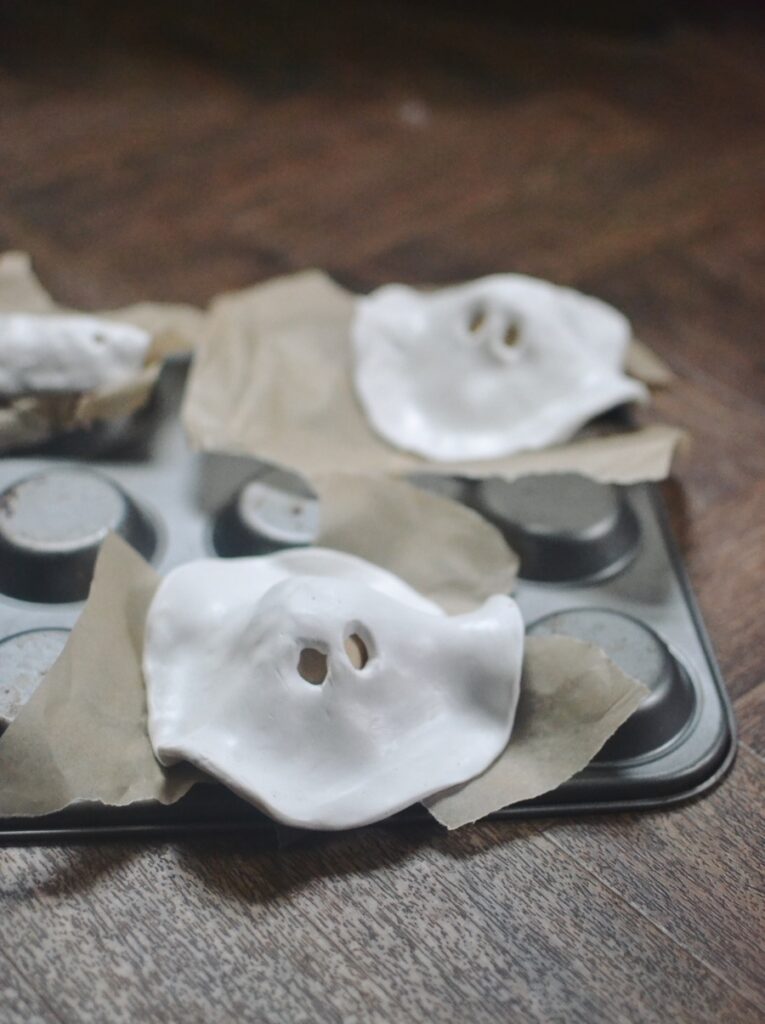
I added little sections of greaseproof paper to where the ghost was touching the tray to make sure it didn’t stick and then baked it in the oven for about 20 mins at 120 degrees.
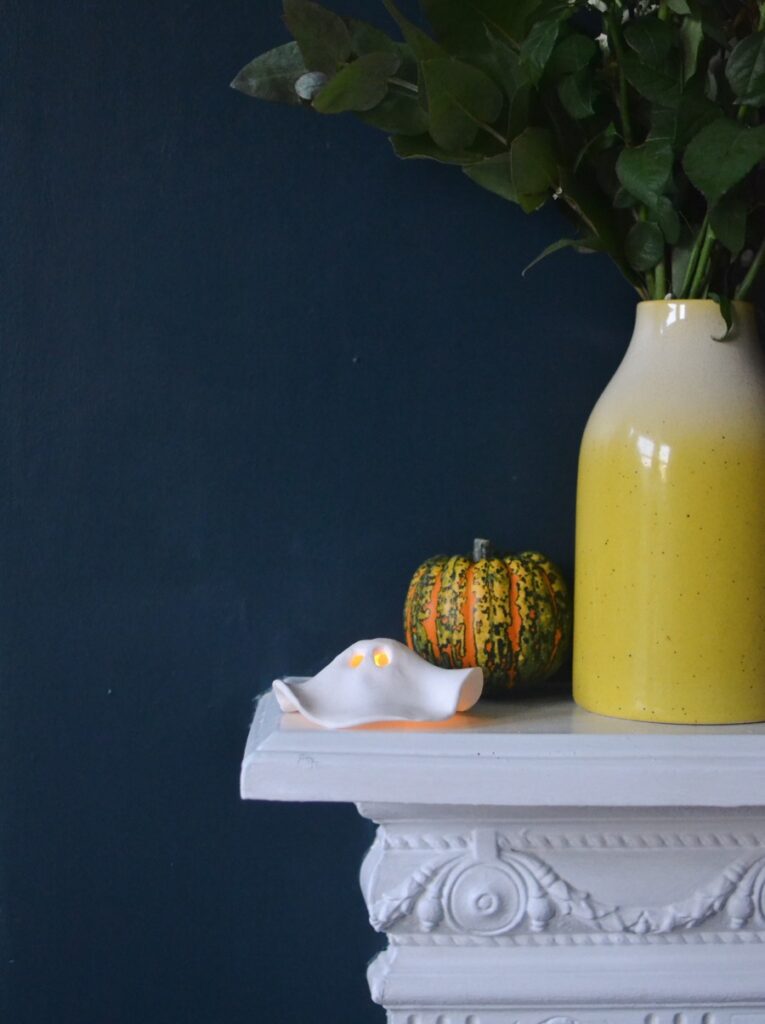

Once cooled, pop it on top of the tea light and you have a lovely little flickering, spooky ghost!
If you have any spooky DIYs and fun crafts, let me know because I’m on the hunt for more to try and keep us all entertained this weekend.