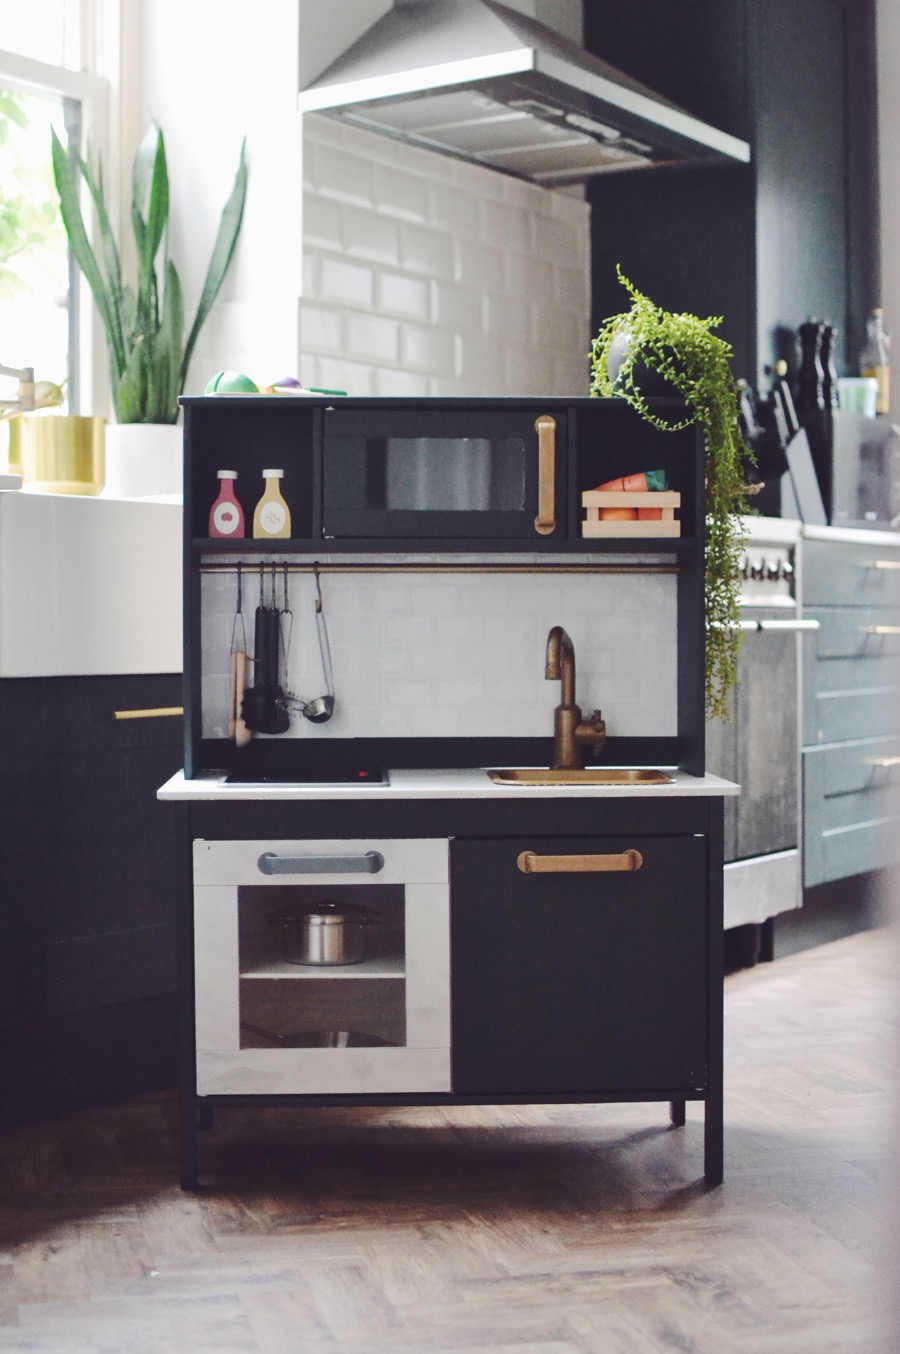
I wanted to do a little Ikea play kitchen hack (or Duktig as it’s known to its friends) for Eva’s birthday in September but because I wanted to make it look like our kitchen, I completely ran out of time! I decided to give it another go for Christmas and miraculously managed to cobble something vaguely presentable in time.
I went through so many Ikea play kitchen hack blog posts and pins but couldn’t find handy things like the dimensions for the backsplash so I thought I’d write up what I did as well as what I’d do if I had more time/extra hands to make it better.
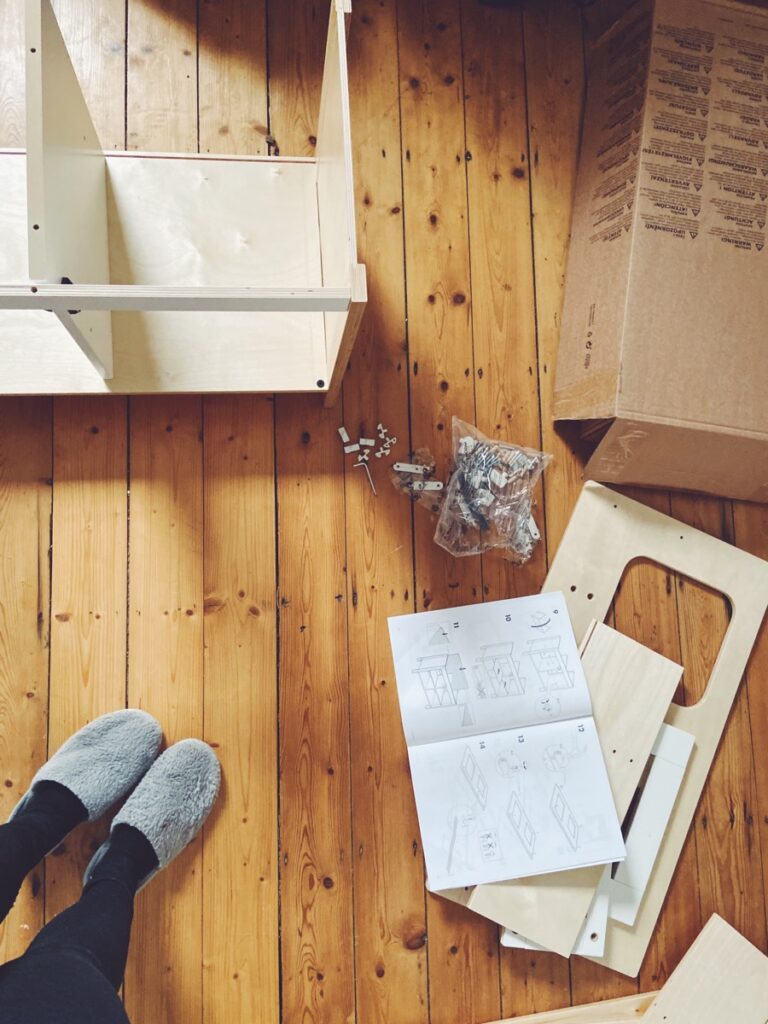
I would recommend getting someone to help with at least the beginning of the build, I had to do a balancing act and suffered some bruised knees trying to get everything screwed in place to start with! It’s not a hugely complicated build but it’s not the easiest either. There are a lot of steps to it because, well, Ikea.
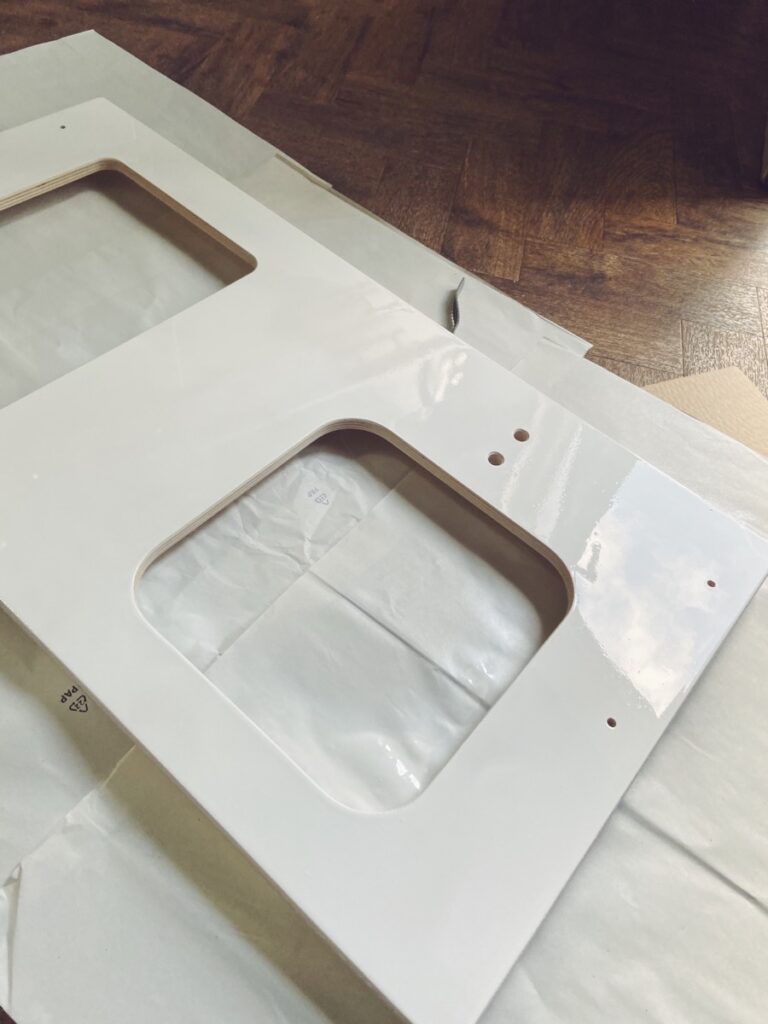
I started by building the base structure that would form the cupboards at the bottom so I had something to work with. I hadn’t done any painting or sanding at this point.
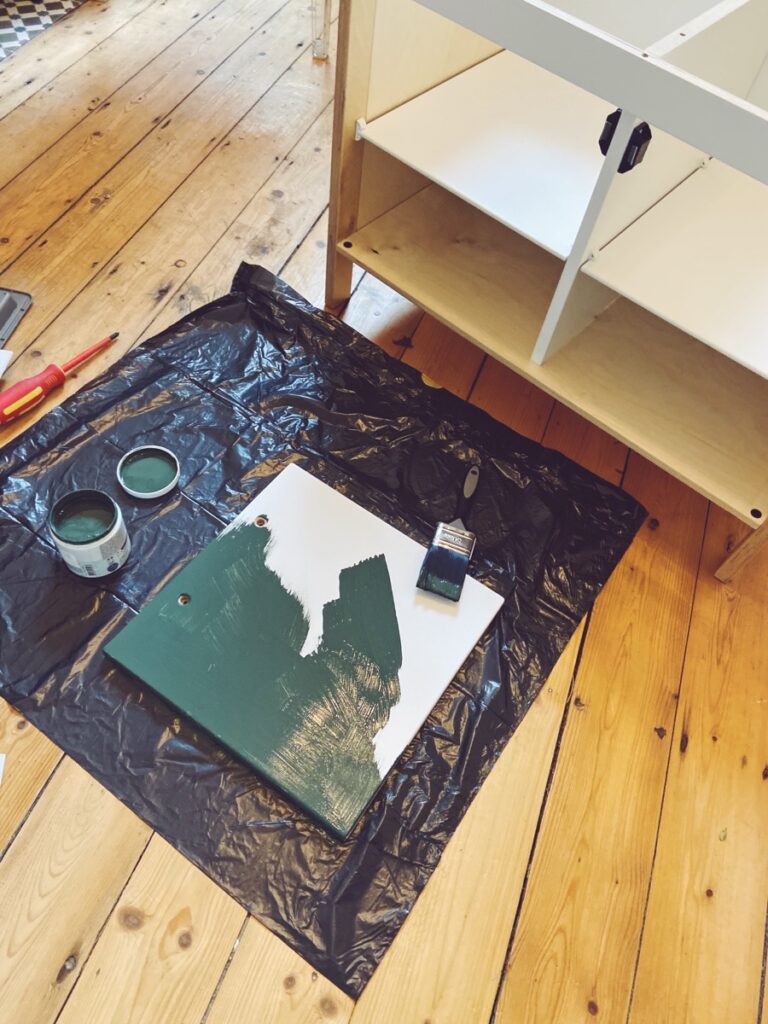
I was really pushing it for time to get it done in time for Christmas (I was limited to stolen time during naps and evenings after work!) so I didn’t sand anything down before I started painting.
If I was to do it again and had more time, I’d definitely sand down everything. The wood has a layer of lacquer/varnish on it meaning the paint is more likely to chip or peel. Though to be fair, Eva’s has barely chipped at all and she goes to town on it every day!

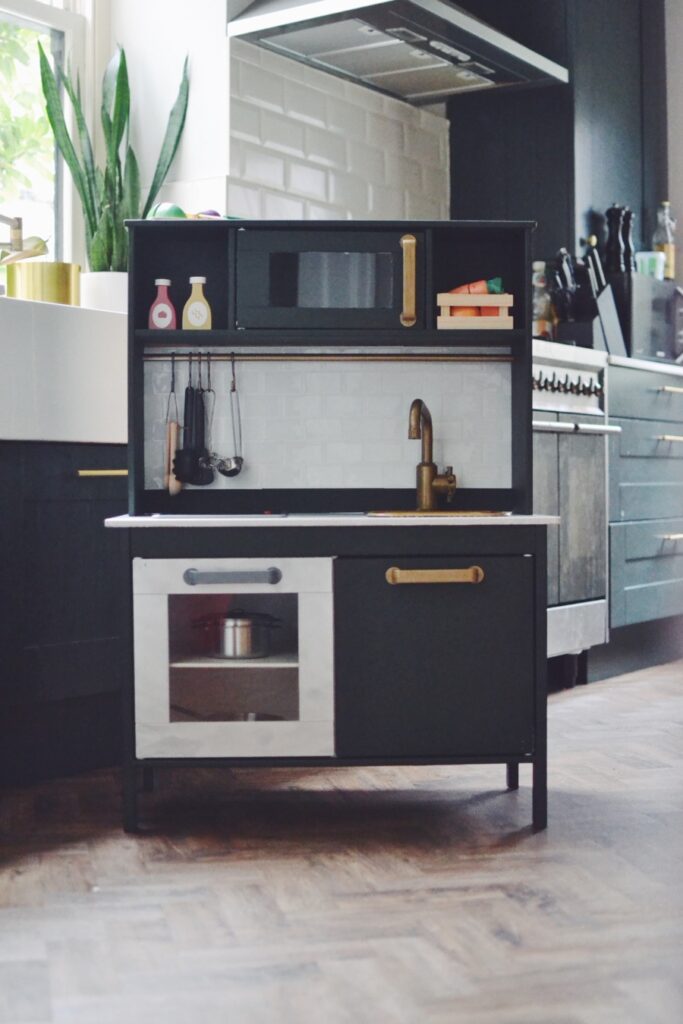
I wanted to colour match our kitchen which is Farrow & Ball Studio Green but I was not keen on spending silly money on paint for an Ikea play kitchen hack! I hunted through the paint samples in B&Q, found one which was very similar called Valley Forge and got a 236ml pot of matt emulsion mixed in the Valspar paint mixing station. I think it was about £3.99.
I would also recommend doing a base coat before cracking on with the colour to give it extra staying power. I again didn’t have time to do this but would if I did it again.
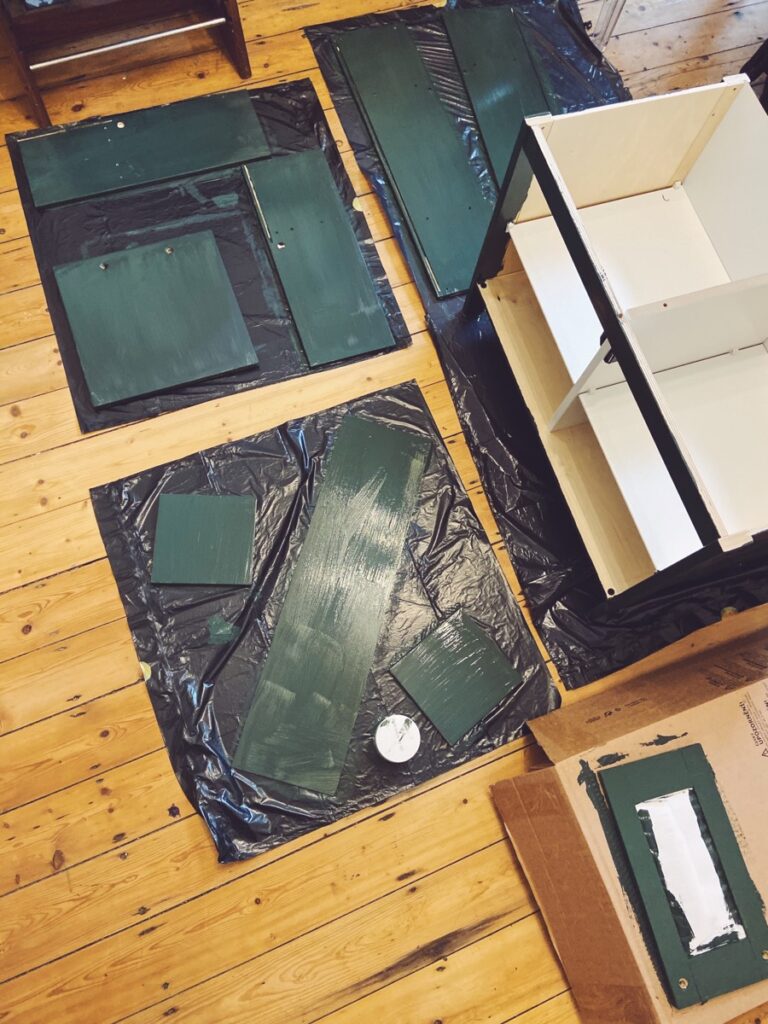
I painted all of the cupboard doors, shelves and sides on both sides as well as the base I’d already built. I did about 2-3 coats on each which worked really well, I still had a little bit left of the tester paint pot left at the end too!
I used frog tape and paper to cover any areas I didn’t want to get paint like the microwave door and I also did a border within the cupboards a bit later on to make it look nice and tidy.
For the worktop I wanted to match our white quartz ones so used a white car spray paint which worked so well! It was only £1 from Poundstretcher too, bargain. I did a coat, left it to dry properly and then another coat and it was ready to go.
I also spray painted the oven door with silver car spray paint (also £1 from Poundstretcher) and covered the clear plastic door with frog tape and paper to make sure it stayed clear. I have seen other people cut out a border of paper around the edge of the clear door then lightly spray the middle with spray paint to get an opaque look like a real oven.
I have also spotted people putting touch lights in the microwave and under the shelf if you fancy getting fancy, you can find them in good old Poundstretcher too.
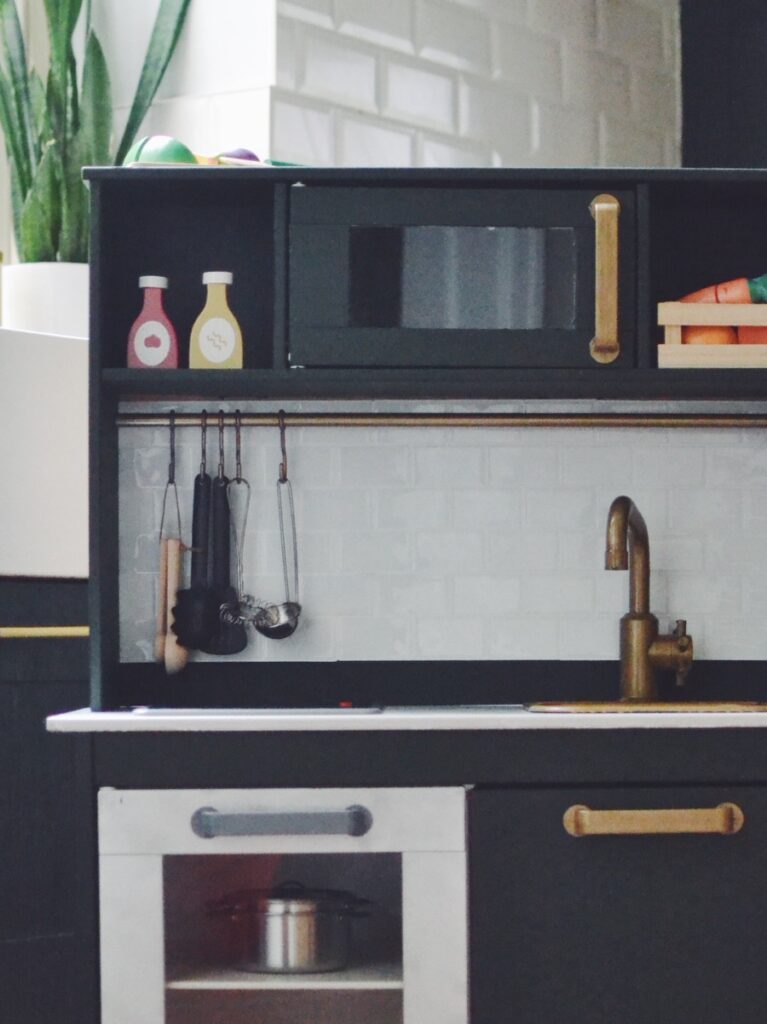
I also spray painted all of the fixtures and fittings like the tap, sink and handles. I did this first as I thought they’d take a while to dry and take a few coats, both of which were right!
I tried a few different kinds of spray paint and enamel paint on the fittings but had more fails than wins! The best one I used was a Rust-oleum gold metallic ‘Painter’s Touch’ craft enamel spray paint but I used it up VERY quickly, you’d probably need a few cans to get everything covered. I got it from B&Q but it’s this one.
I used another trusty £1 car spray paint in grey for the oven handle too. I went through a lot of spray paint!
For the actual spray painting, I did it in the Ikea play kitchen box so I could easily take it outside and back in for spraying so I didn’t fill the house with fumes. I also made little holes in the bottom of the box so I could stand the tap and handles up for easy sprayage. Sprayage is totally a word. Honest.
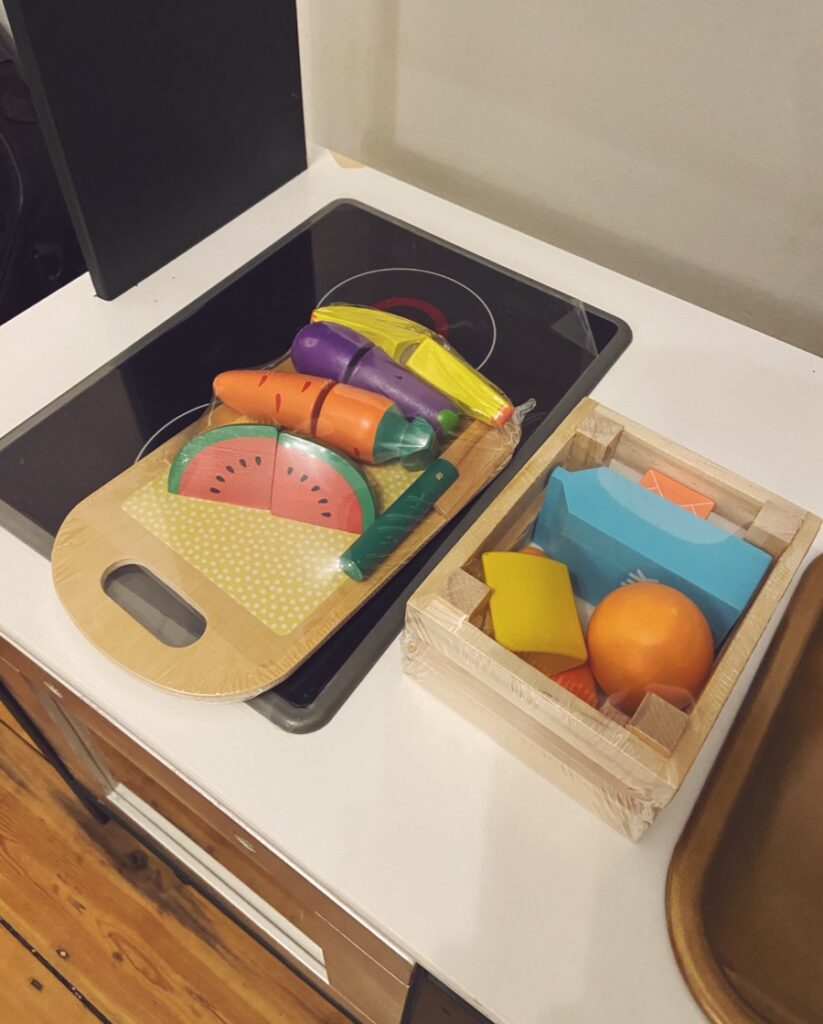
Not the most wonderful photo but I got some lovely wooden food for the kitchen from Hema including this wooden set of groceries and a chopping board set that sadly seems to be out of stock. I got the ketchup and mustard as well as a few more wooden food bits from Sostrene Grene.
I also got the utensils and saucepan set from Ikea, I didn’t bother spray painting those though because who really needs a gold frying pan?
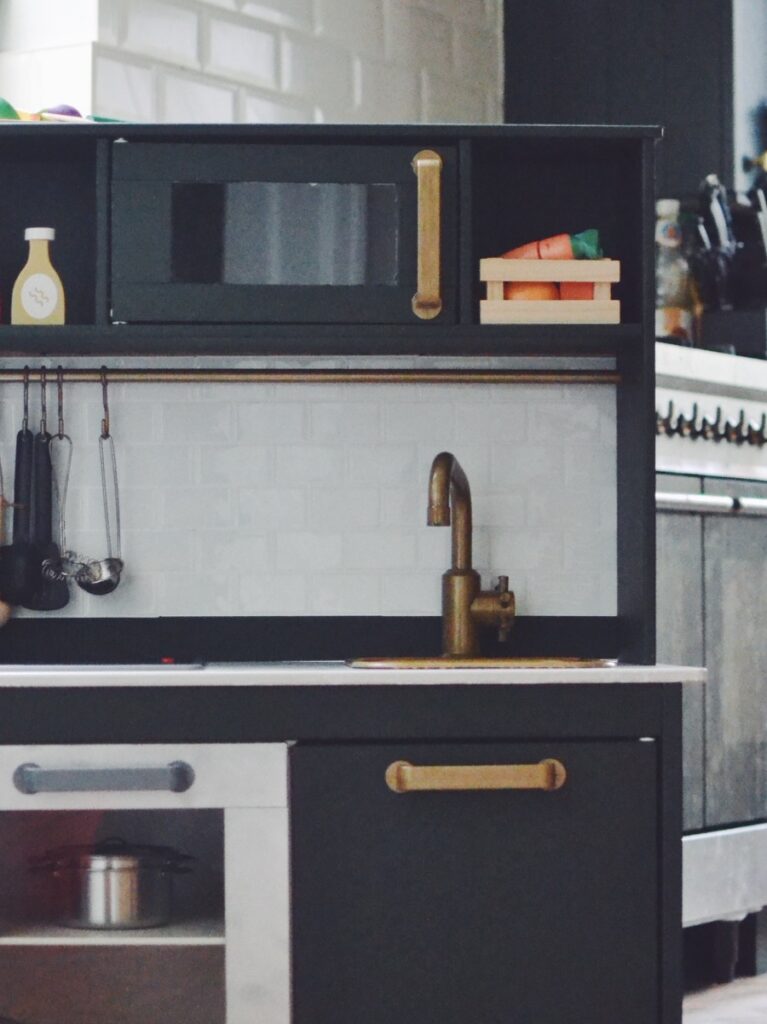
I could not find any details on the backsplash dimensions for the Ikea play kitchen anywhere! The actual space is 32 x 67.5cm if you need it.
I got a thin sheet of MDF that was the right width but taller than I needed so it was easier to attach it. Foamboard would also work really well for the backsplash.
I found some adhesive mini subway tiles (basically big stickers!) on Amazon, these are the ones I used, I bought 3 packs at £3.99 each. They work really well! They have started to peel a little but nothing a bit of PVA won’t sort out.
There are lots of different options on Amazon for adhesive tiles too so well worth having a look around there! But of course wallpaper or paint would work well too.
I added a small border of paint at the bottom too to match the back bit of our oven.
Once the backsplash was all done, I propped it up in place and nailed it to secure it. I used about 5-6 small nails to secure it at the sides and the top. I was VERY careful not to nail through to where you could see it or little fingers could get scratched.
So I think that covers it all! But let me know if you have any questions. I’m really happy with how it turned out and Eva loves it thankfully. Now we can cook side by side in our matching kitchens!
Supplies I used and costs:
- Ikea Duktig kitchen – £60
- Valspar colour match 236ml pot – Valley Forge – £3.99
- Spray paint – gold, grey, silver and white – about £12 all together
- Paintbrush – had already
- Frog tape (and paper) – had already but about £4.50
- Adhesive subway tiles – £11.97 for 3
- MDF (but foamboard would work too) – free, pinched from my dad but on Amazon or B&Q for around £10-15
- Nails and hammer – had already
- Wine
So in total including the kitchen it cost me around £90 which isn’t too bad as it was her main Christmas present. It’s a great cheap project if you have paint and wallpaper left over from other DIY adventures!
If you wanted to go the extra mile, you could replace the handles with fancier ones, add some knobs for the cooker or add a mini chalk board for tiny meal planning on the side.