If you take a look through my Instagram or blog, you’ll rarely ever see me cracking a big toothy grin because I hate my teeth. I had full on train track braces when I was 16 but sadly the year after I had them taken off, all my wisdom teeth came in at the same time so everything got shifted about again. My main problem is what I call ‘snaggle’, the tooth next to my front teeth sticks out at an angle and I am SO self conscious of it, both in photos and real life.
I’ve deleted or untagged myself in most photos with my teeth showing for about the past 10 years so I decided to treat myself to invisible braces while I’m on maternity leave and don’t have to worry about meetings or presentations at work. I was very hesitant to spend that much money on myself and was quoted over £2k for Invisalign on my top teeth but then I was recommend Your Smile Direct which was much more affordable and everything can be done at home, ideal for me as I didn’t want to have to drag Eva to the dentist all the time.
I’ve now had the braces in for a few weeks so I wanted to post about my first impressions so I can keep a diary as I go along. Hopefully it’ll be useful if you’re thinking of getting clear braces too.

How it Works
Your Smile Direct is nice and easy to get started with. You can either book in for a free 3D scan with a local dentist or you can get an at home kit where you make your own impressions, send them off and the braces are made for you from them. I opted for the 3D scan to make sure it was perfect and went to a dentist in the centre of Manchester. It took around an hour (I took Eva and her playmat, she played while I had it done) and they use a probe (not the best word but not sure what else to call it!) to scan every bit of your teeth, then create a 3D digital model of them. From this, they create your treatment plan and you get an email with a link to your plan about 3 weeks later, this is a step by step 3D digital model of how they’ll look at every stage. Mine has 7 stages and should take around 4 months to complete wearing the braces 22 hours a day.
What you get
Once your happy with the treatment plan, you pay for them which is £1,599 for both top and bottom (a lot of money but a lot cheaper than Invisalign and less visible/painful than train tracks). Your braces go into production and they arrive in the post around 3 weeks later. In the box you get your braces, each in separate bags with numbers on them that correspond with your treatment plan, chewies (rubber things you chew on a few times a day to get the braces to fit better), pullies which are little tools to help you get them off but I haven’t needed to use them yet, a case for when you’re not wearing them, a dos and don’ts guide and a sexy mouth opener (I googled it, that’s actually what it’s called!).
How they feel
At first they are PAINFUL. But they’re moving your teeth so it was never going to be pleasant. But your teeth quickly settle so after about 24 hours they’re not painful. My teeth were quite sensitive when I ate (you have to take them out to eat) for a few days but settled down after that. Paracetamol helped a lot but I doubt you’d need anything stronger. Eva is teething at the moment so it’s nice that we’re going through it together!
They feel a bit weird in my mouth, I had envisioned those plastic Halloween vampire teeth but thankfully they are nothing like that. I can barely feel them now really, they fit so snugly to my teeth that I don’t really notice them anymore. There is a little gap at the back of my front teeth that my tongue touches when I talk that sometimes gives me a lisp but this seemed to be more at the beginning of my treatment and at the end when they started to become loose, which means it’s working well, hoorah! I’ve also had a bit of rubbing but you can file down problem areas with a nail file.
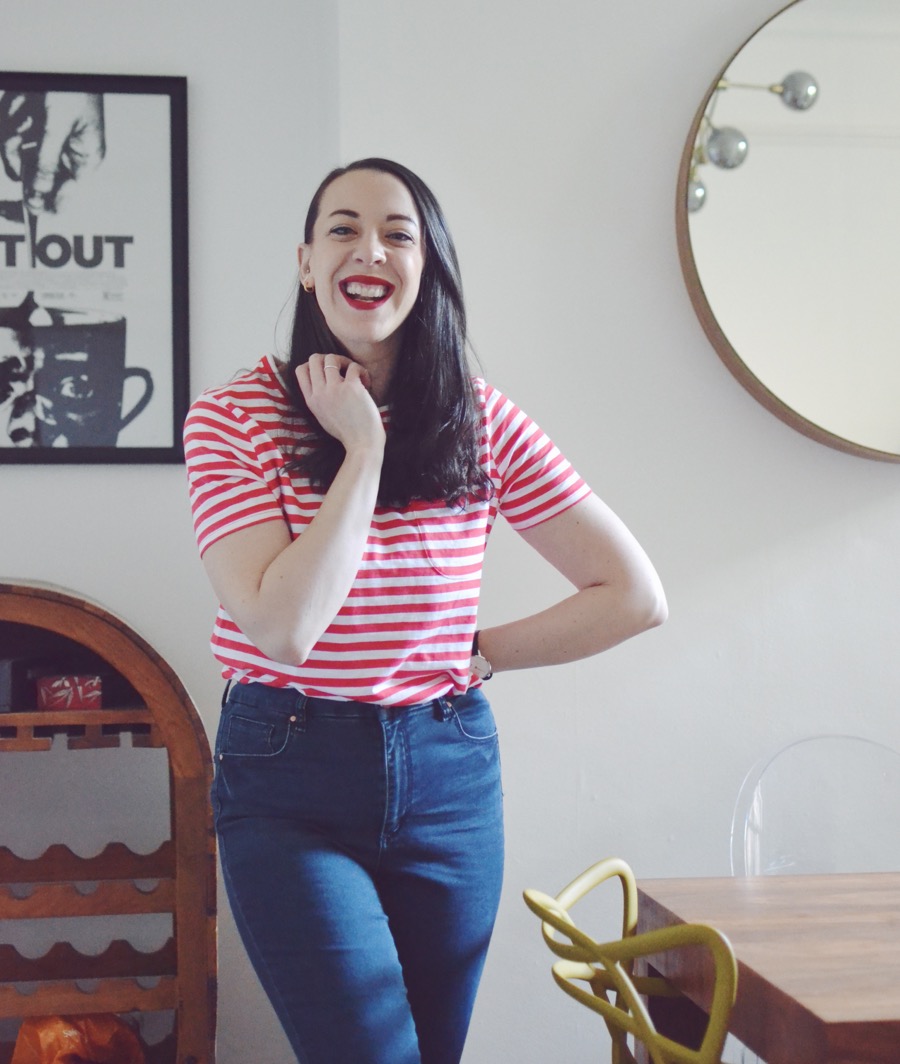
How they look
I was really surprised by how little you can see them! I’m wearing them in the photos above and you can barely see them. The only thing you can see quite clearly is the top of them on my top teeth but it’s barley visible which helps a lot with the confidence. I’m very self conscious of how I sound when I talk but I think that’s mostly me being overly critical and I’ve got so much more used to them that it doesn’t bother me as much now.
You have to take them out every time you eat and then clean them before putting them back in (I use a soft toothbrush and normal toothpaste) so they’re generally always nice and clean. But if you’re somewhere where you can’t just whip out a toothbrush, you can give them a good rinse and pop them back in, just make sure to brush as soon as you can.
First Impressions
So yes, first impressions are that I’m really happy with them! They’re a little uncomfortable of course but I am shifting my teeth around my mouth so I didn’t expect anything else really. My main problem is that I’ve had to break my gum chewing habit I’ve had since I was about 12 and I can’t stuff my face with biscuits at all times of the day which is probably a good thing!
Taking them out to eat is annoying of course, that’s my main hang up with them which wouldn’t be the case with train track braces. It doesn’t hurt to take them out after the first day or two but it is annoying to have to take them out, clean them, brush your teeth, clean them and then put them back in, if I was at work all day I’d find this even more annoying I’m sure.
But all in all, I’m really happy and don’t regret spending that much money on something for me. I’ve pretty much spent the past year and a bit growing and raising Eva so I’m happy to give me something as a reward, and I chose straighter teeth that will make me more confident!
For more information, visit the Your Smile Direct website here. You can also get 50% off home smile kits with the code HIKTWEET50* if you want to start your own journey.
*I paid for the treatment myself but got in touch to ask for a discount code to share with you which is why it’s personalised!